

How to Apply Structural Bonding Tape Step by Step
Last Updated: November 5, 2026
Quick Summary
To apply structural bonding tape, first clean both surfaces with a degreaser and let them dry fully. Cut the tape slightly smaller than the bonding area, position one end, then press down while removing the liner gradually. Align the second surface before contact, press firmly and evenly, then leave the joint undisturbed.
- Clean both surfaces with 3M Surface Cleaner and let them dry fully before applying tape.
- Cut the tape slightly smaller than the bonding area so it sits inside the edges.
- Line up parts before contact, because the tape bonds on first contact.
- Bond strength builds over time: about 90% after 24 hours and full strength after 48 to 72 hours.
- Do not load the joint before it has cured, since this is a common cause of failure.
Table of Contents
- What Structural Bonding Tape Is and When to Use It
- What You Will Need Before You Start
- Structural Bonding Tape Surface Preparation
- Step-by-Step Application of Structural Bonding Tape
- Best Tape for Bonding Metal to Metal
- Structural Tape Application Temperature and Curing Times
- Common Installation Errors and How to Avoid Them
- Order Your Bonding Tape from Just Tape
- Frequently Asked Questions
What Structural Bonding Tape Is and When to Use It
Structural bonding tape is a double-sided foam tape that holds two surfaces together with a strong, permanent-feeling bond. 3M VHB tape is a high-performance acrylic adhesive tape that can be used in place of rivets, screws and welds in many light-to-medium duty jobs.
Many people reach for it when a screw would show, a weld would damage a finish, or a surface is too thin to drill. It suits metal, painted surfaces, glass and many plastics, though the exact result depends on the surfaces involved.
Structural tape works best when the parts stay in place while the adhesive grips. It is less suited to surfaces that flex heavily, get very hot or face constant water exposure unless the product listing says otherwise. Always check the listing before you commit to a project.
What You Will Need Before You Start
Gather your materials before you peel anything. A bond made in a rush is the most common reason a project fails.
- Structural bonding tape (3M VHB tape in grey or clear, from our range)
- 3M Surface Cleaner sachet for degreasing both surfaces
- Lint-free cloths or paper towels
- A sharp craft knife or scissors for cutting the tape to length
- A ruler or measuring tape
- A roller or firm, flat tool for applying pressure
- Masking tape to hold parts in position while you work
Our 3M VHB double-sided tape rolls come in a 3 metre length with a choice of grey or clear finish. For smaller jobs, our 3M double-sided sticky pads are an easy option. Both products are listed on our site with their full specifications.

Structural Bonding Tape Surface Preparation
Surface preparation decides how strong the bond will be. A clean, dry, grease-free surface gives the adhesive the best chance to grip.
Start by wiping both surfaces with the 3M Surface Cleaner. The cleaner is a solution of isopropyl alcohol in water that evaporates quickly and leaves no residue. Use one cloth to apply it and a clean cloth to wipe it away.

- Remove dust, oil and fingerprints before cleaning
- Let the surface dry fully before applying tape
- Avoid touching the bonding area once it is clean
- Check that painted surfaces are fully cured and not flaking
Plastics can need extra care. Some plastics have low surface energy, which makes adhesion harder. Test a small hidden area first if you are unsure about the material.
Step-by-Step Application of Structural Bonding Tape
Follow these steps in order for the most reliable result. The sequence matters as much as the tape itself, because each stage sets up the next.
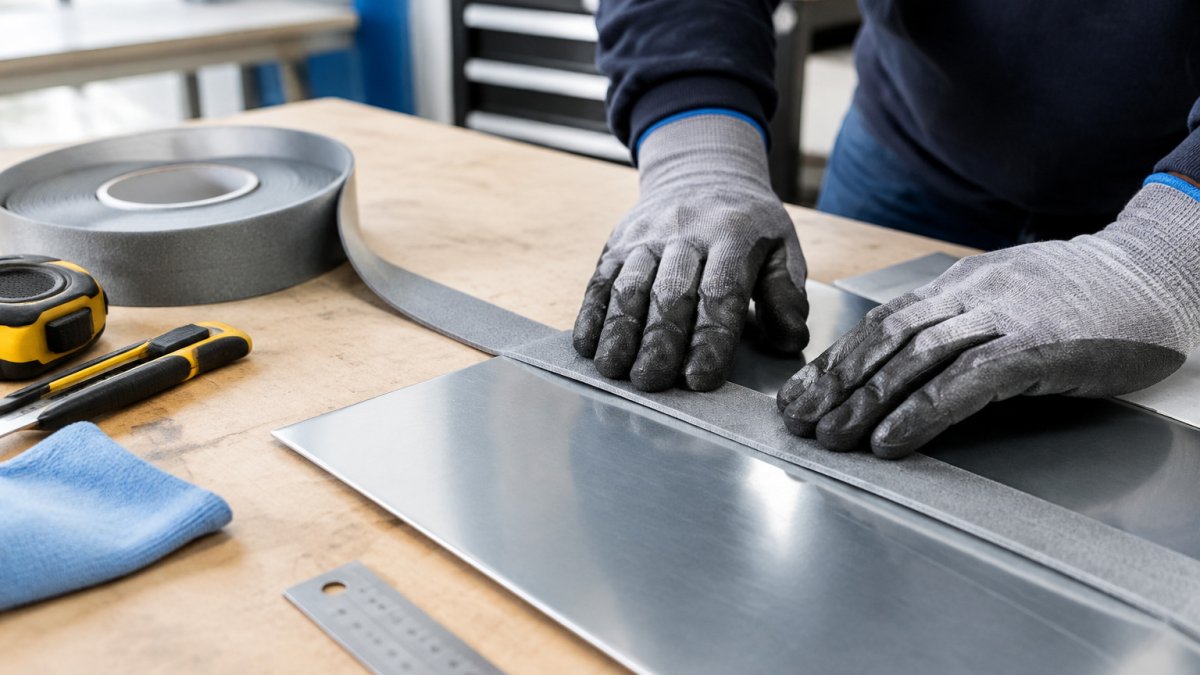
- Clean both surfaces. Wipe with the 3M Surface Cleaner and a lint-free cloth, then wipe again with a clean cloth. Let the surfaces dry fully. Do not touch the bonding area after cleaning, because skin oils transfer easily and reduce adhesion.
- Assess the substrates. Check that both surfaces are sound, flat and compatible with the tape. Painted surfaces should be fully cured, not flaking or soft. Some plastics have low surface energy, which can make adhesion harder. Our detailed guide to bonding plastic to metal surfaces covers the preparation steps for that combination. Test a small hidden area first if you are unsure.
- Measure and cut the tape. Cut the tape slightly smaller than the bonding area so it sits fully inside the edges. A sharp craft knife gives a cleaner edge than scissors on foam tape. Allow a small gap at the edges so the tape does not squeeze out when pressure is applied.
- Position the tape on one surface. Peel back a small section of the release liner and place that end first. Work along the length, pressing the tape down as you go. Avoid stretching the tape, because it can spring back and lift at the ends.
- Remove the liner gradually. Peel the liner away as you press the tape down, so you avoid trapping air. On longer runs, peel the liner in short sections rather than all at once. A roller helps here, working from the centre outwards.
- Align and press the second surface into place. Line up the parts carefully before contact, because the tape bonds on first contact. Use masking tape as a hinge or alignment guide if the parts are awkward to hold. Once the surfaces meet, apply firm, even pressure across the whole area.
- Leave the bond to cure. Do not load or move the joint until the adhesive has set. Handling time and full cure depend on temperature and the product; check the listing for guidance.
Once the tape touches the second surface, repositioning becomes difficult. Take your time with alignment.
Watch out: pulling the parts apart after the adhesive has made contact can damage the tape and the surface. Get the position right first time, and if you must separate them, use fresh tape rather than reusing the compressed foam.
Applying Pressure and Dwell Time
Pressure helps the adhesive flow onto the surface and form a firm contact. Press the joint firmly with a roller or flat tool, working from the centre outwards. Aim for a consistent pressure across the whole bond area rather than a hard press in one spot. Apply firm, even pressure across the joint, and always follow the product-specific guidance on the listing.
Bond strength builds over time. At room temperature, the adhesive reaches about half its final strength after 20 to 30 minutes, around 90% after 24 hours, and full strength after 48 to 72 hours.
Dwell time is the period the parts must stay in contact without load. Use masking tape, clamps or a temporary support to hold the joint during this window. Avoid stressing the joint during this period. Give it time before you hang, load or handle the part heavily.
Temperature affects both pressure and dwell. In a cold workshop, the adhesive flows more slowly, so allow extra time and consider warming the surfaces gently with a hairdryer on a low setting before application. In hot conditions, the adhesive can soften before it sets, so keep the parts supported for longer. Humidity and ventilation also matter: work in a dry, well-ventilated space where possible, and avoid applying tape in damp or dusty conditions.
Watch out: loading the joint before it has cured is one of the most common causes of creep and eventual failure. If you need to test the bond, leave it undisturbed for at least 24 hours first, and treat that as a minimum rather than a guarantee.
3M VHB DOUBLE SIDED SELF ADHESIVE TAPE ROLLS - Grey or Clear →
The table below sets out each stage of the process with the timing the article gives.
| Step | What to do | Time or frequency |
|---|---|---|
| 1. Clean both surfaces | Wipe with 3M Surface Cleaner, then wipe again with a clean cloth | Let dry fully before applying tape |
| 2. Assess substrates | Check surfaces are sound, flat and compatible | Test a hidden area if unsure |
| 3. Measure and cut | Cut slightly smaller than the bonding area | Use a sharp craft knife |
| 4. Position tape | Place one end first and press down as you go | Avoid stretching the tape |
| 5. Remove liner | Peel gradually while pressing down | Peel in short sections on longer runs |
| 6. Align and press | Line up parts before contact, then press evenly | Bond forms on first contact |
| 7. Leave to cure | Do not load or move the joint | At least 24 hours before testing |
Best Tape for Bonding Metal to Metal
For metal-to-metal bonding, the 3M VHB double-sided tape rolls are our top pick. They are a high-strength acrylic tape suited to metal, and you can choose grey or clear depending on the look you need.
Our 3M double sided sticky pads suit smaller jobs and can be used on a range of items, including car parts and household goods.
Both products are sold on our site, and our team can help you choose the right width for your project.
Structural Tape Application Temperature and Curing Times
Temperature affects how well structural tape bonds, and it is one of the most overlooked factors in a failed application. Apply it in a clean, dry space at room temperature where possible. Very cold surfaces can slow adhesion, and very hot conditions can soften the adhesive before it sets.
Check the product listing for the recommended application temperature range, as formulations vary. Check the product listing for the specific range, because formulations vary.
Humidity and ventilation also play a part. High humidity can affect some substrates and slow drying after cleaning, so allow extra drying time. Work in a well-ventilated space, especially when using solvents or cleaners, and avoid applying tape in damp, dusty or windy conditions where contamination is likely.
The bond continues to strengthen after you apply it. Allow the bond time to reach full strength before it takes full load. For a quick test, leave the bond undisturbed for at least 24 hours before you rely on it.
If you need to bond in a cold workshop or outdoors, allow extra curing time and check the product guidance for the temperature range. Warming the surfaces gently before application can help, but avoid direct heat that could distort the substrate or soften the tape. In hot weather, keep the parts supported for longer and avoid direct sunlight during cure.
Watch out: applying tape to a cold surface and then loading it on the same day is a common cause of early failure. The adhesive may feel tacky but will not have developed enough strength to hold under load.
Common Installation Errors and How to Avoid Them
Most failed bonds come down to a small number of mistakes. Watch for these:
- Skipping the cleaning step, which leaves oil or dust on the surface
- Pressing the parts together before lining them up
- Leaving air pockets because the liner was removed too quickly
- Applying too little pressure across the bond area
- Loading the joint before it has cured
- Using the tape on surfaces it was not designed for
A common mistake is removing residue with the wrong tool. If adhesive is left on a surface, clean it gently with a suitable solvent and test on a hidden area first. Our guide explains how to remove adhesive residue from metal safely.
If a bond fails, look at the surface first. Dirt or grease is the usual cause, so clean again and reapply with fresh tape where possible.
Order Your Bonding Tape from Just Tape
Ready to start your project? Browse our full range of 3M VHB tapes, sticky pads and surface cleaner at Just Tape. Our expert support team is ready for enquiries about your project. Contact us if you have questions before you order.
Frequently Asked Questions
How do you apply structural bonding tape?
Clean both surfaces with a suitable cleaner, such as the 3M Surface Cleaner sachet, and let them dry fully, then peel the liner from the tape and press it firmly onto one surface. Remove the second liner, position the other part carefully because the adhesive grabs on first contact, and apply firm, even pressure across the whole area. Hold the bond under pressure for the time specified by the manufacturer before handling or loading it.
How should you prepare a surface before applying bonding tape?
The surface should be clean, dry, smooth and free of grease, dust, oil and loose paint. Wipe it with a 3M VHB Surface Cleaner sachet, which is an isopropyl alcohol and water solution that evaporates quickly and leaves no residue, to maximise bonding capability. Allow the surface to dry completely before applying the tape, as moisture or solvent left behind will weaken the bond.
How long does structural bonding tape take to reach full strength?
At room temperature, about 50% of bond strength is reached after 20 to 30 minutes and about 90% after 24 hours. Full strength is generally expected after 48 to 72 hours, so avoid placing heavy loads on the bond until then. Bond strength builds as the adhesive flows onto the surface, so pressure applied during installation helps it develop properly.
Which tape should you choose for bonding metal to metal?
Choose a high-performance acrylic foam tape such as 3M VHB, available from Just Tape in grey or clear, in a width suited to your project. Clean both metal surfaces with a surface cleaner, apply pressure during bonding, and allow the full curing period before stressing the joint. Check the product listing for width and roll length before ordering.
