

How to Mount Cable Clips Without Damaging Desk Surfaces
Last Updated: November 4, 2026
Quick Summary
Clean the spot with isopropyl alcohol, let it dry, then press a removable adhesive clip firmly for about 30 seconds and leave it for 15 minutes before loading cables. Test the adhesive on an unseen corner first, as cable clips can lift laminate or veneer finishes.
- Clean the surface with isopropyl alcohol and let it dry fully before applying.
- Press the clip firmly for about 30 seconds using even pressure.
- Leave the clip undisturbed for at least 15 minutes before loading cables.
- Test the adhesive for 24 hours in an unseen corner before full installation.
- Remove clips by warming the adhesive gently with a hairdryer on low.
Table of Contents
- Why Cable Clips Damage Desk Surfaces and How to Avoid It
- Checking Your Desk Surface Before You Stick Anything
- Choosing the Best Adhesive Cable Clips for Desks
- Step-by-Step: Mounting Cable Clips on a Desk Surface
- Cable Management Under Desk Without Drilling
- How to Remove Sticky Residue From Desk Surfaces Safely
- Booking Your Next Cable Tidy-Up With Just Tape Supplies
- Frequently Asked Questions
Why Cable Clips Damage Desk Surfaces and How to Avoid It
Most cable clip damage has nothing to do with the clip itself. It comes from the adhesive, the surface underneath, or both. Adhesive tapes are well suited to this kind of job, and the right prep and product choice will protect your desk finish.
The damage usually shows up in three ways: peeling laminate, a dull patch where the finish has been stripped, or a sticky film that refuses to come off. Each one has a clear cause, and each one can be avoided.
What causes the damage:
- Strong adhesive bonded to a soft or sealed surface
- Dust, oil or polish left under the clip, which weakens the bond
- Pulling a clip off too fast, which lifts the top coat with it
Keep the aim simple: a clip should hold firmly for years and leave the desk exactly as it was when you remove it.
Checking Your Desk Surface Before You Stick Anything
Before you apply any adhesive, identify what your desk is made of. Laminate, melamine, veneer, solid wood, glass and painted metal can all react differently to tape, so test before committing.
Use this compatibility guide as a starting point. It reflects the general behaviour of pressure-sensitive adhesives on common desk finishes, not a guarantee for every product.
- Laminate and melamine: Generally good for removable adhesives, but the factory seal can be thin at edges and corners. Avoid placing clips within 20 mm of a cut edge, where moisture and adhesive can creep under the seal.
- Real wood veneer: The most fragile common finish. Veneer is a thin slice of wood bonded to a substrate, and a strong adhesive can pull splinters or lift the veneer itself. Test first, and prefer a gentle removable product.
- Solid wood: Usually tolerant of adhesive, but open-grained or oiled timbers can hold residue in the pores. Clean with isopropyl alcohol and avoid oil-based polishes before sticking.
- Glass: Excellent for adhesion and easy to clean, but cheap or damaged glass can chip at the edge if a clip is levered off. Peel rather than pry.
- Painted metal: The paint, not the metal, is the weak point. Powder-coated and sprayed finishes can flake if the adhesive is stronger than the paint bond. Test on an unseen underside first.
- High-pressure laminate (HPL) and compact laminate: Dense and smooth, so adhesion is strong, but the surface can dull if harsh solvents are used during removal.
Run this quick test before committing to a full installation:
- Look for a clear factory finish or sealant, and note any edges, chips or worn patches.
- Press a small piece of the intended tape in an unseen corner, such as under the desk edge or inside a cable tray.
- Leave it for 24 hours, then peel it slowly back on itself rather than upwards.
Watch out: if the tape lifts the finish, or leaves a ghost mark, choose a gentler option or use a mechanical fix such as a screw-in clip or an under-desk tray instead. Surfaces with an unknown finish, such as older second-hand desks or refurbished office furniture, deserve the most caution, test on the underside first and wait the full 24 hours before trusting the result.
Choosing the Best Adhesive Cable Clips for Desks
Not every adhesive suits every desk, and not every clip suits every cable. The best choice depends on three things: how heavy the cable run is, how often you plan to move it, and what the desk surface is made of. Most guides stop at the first two; the third is where damage usually starts.
Match the clip to the load
Adhesive clips are often rated by the manufacturer for a static load, and those figures assume a clean, smooth, non-porous surface and a full cure. Where a clip will be tugged or moved, it is sensible to work well below the manufacturer's stated maximum.
- Light cables (phone and charger leads, thin USB): a small self-adhesive clip is usually enough. These carry very little load and are the easiest to remove cleanly.
- Medium cables (monitor leads, HDMI, USB-C docks): choose a foam-backed or nano-tape clip with a wider footprint. The foam spreads the load across a larger area, which reduces stress on the finish and lowers the chance of peel failure.
- Heavy cables and power bricks (kettle leads, power strips, laptop chargers): adhesive alone is often marginal. A power brick can weigh well over 500 g, and a hanging brick creates a constant peel force on the clip. Consider a mechanical fix, such as a screw-in clip or an under-desk tray, or support the brick on the floor or a shelf and clip only the cable.
- Anything you may move later: pick a removable adhesive that comes away cleanly, and accept a lower load rating in exchange for reversibility.
Environmental durability
Adhesive performance changes with heat and humidity. A clip near a heat source or in a damp area may soften or lose grip over time. If a clip must sit in a warm spot, check it every few months.
Product options
For the strongest hold on smooth, clean surfaces, the 3M FOAM Double Sided Adhesive Sticky Pads are a good option. The foam spreads the load across a wider area, which reduces stress on the finish. For a clear, residue-free option that you can take off and reuse, the Nano Tape is worth considering. It is transparent, removable and washable, and it suits tiles, glass, metal, wood and plastics.


Watch out: a strong pad on a dirty or oily surface will still fail. Match the adhesive to the surface first, then to the cable weight, not the other way round.
Step-by-Step: Mounting Cable Clips on a Desk Surface
Follow these steps in order. Skipping the preparation is the most common reason clips fall off or damage the surface.
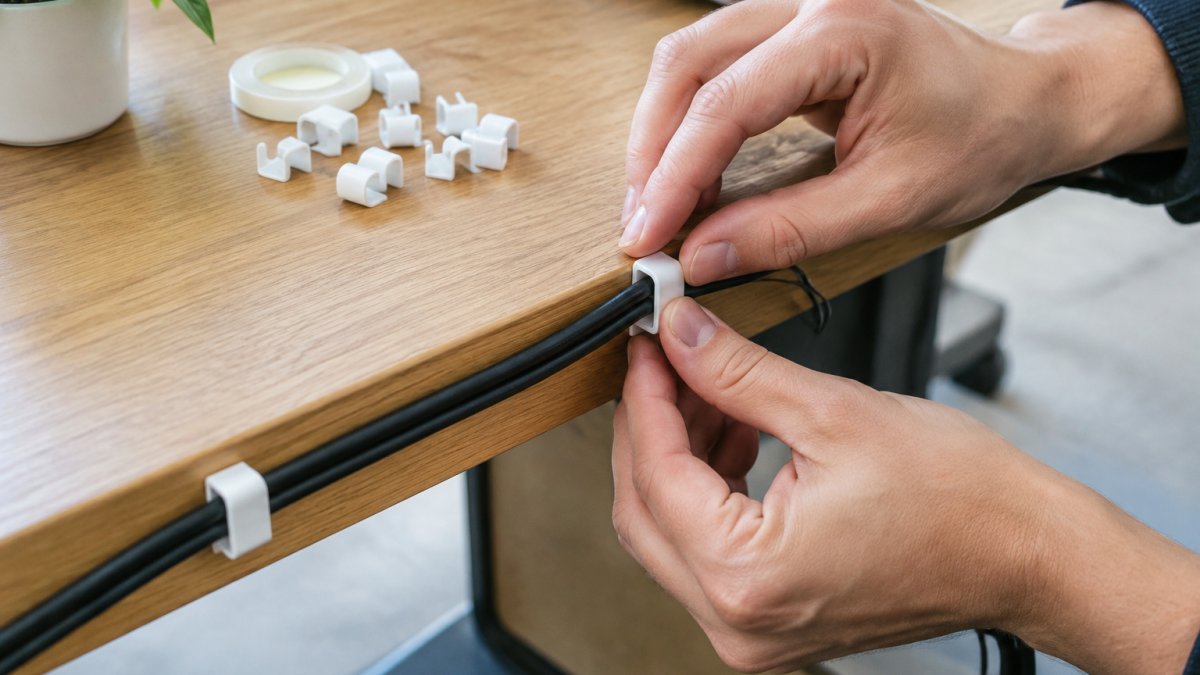
Before you start, gather:
- A lint-free cloth
- Isopropyl alcohol
- Your cable clips and adhesive pads
- A ruler or tape measure
Preparing the surface with isopropyl alcohol
Clean the spot where the clip will sit. Dust, oil and furniture polish are the main enemies of adhesion.
- Wipe the area with a dry cloth to remove loose dust
- Dampen a clean cloth with isopropyl alcohol and wipe the spot
- Let the surface dry fully, which takes a minute or two
For a clean finish that bonds well, the 3M Surface Cleaner Sachet is designed for this job. It is a pure solution of isopropyl alcohol in water. It evaporates quickly and leaves no residue.
Watch out: never soak the desk. Excess liquid can seep under the laminate edge and cause swelling.
Applying and curing the clip
Position the clip first, then press it into place.
- Mark the position with light pencil or a strip of masking tape
- Peel the backing from the clip or pad
- Press firmly for about 30 seconds, using even pressure
- Leave the clip undisturbed for at least 15 minutes before loading cables
Many adhesives reach their full strength over 24 hours. Avoid pulling on cables during this time. Rushing the cure is the main reason clips come away later.
The mounting process comes down to a few clear steps, each with its own timing, so the table below sets them out for quick reference.
| Step | What to do | Time or frequency |
|---|---|---|
| Wipe dry | Remove loose dust with a dry cloth | Before cleaning |
| Clean | Wipe with isopropyl alcohol on a cloth | Once |
| Dry | Let the surface dry fully | 1-2 minutes |
| Position | Mark the spot with pencil or masking tape | Before peeling |
| Press | Apply firm, even pressure to the clip | About 30 seconds |
| Cure | Leave undisturbed before loading cables | At least 15 minutes |
| Full strength | Avoid pulling on cables while adhesive sets | Up to 24 hours |
Cable Management Under Desk Without Drilling
Under-desk cable management can be done without drilling, and it keeps the top of the desk clear. Most setups combine a few simple tools.
Try a layered approach:
- Clip the main power cable to the underside of the desk edge
- Use a tie or strap to bundle the loose cables together
- Route the bundle towards the back, away from your feet
Plan the route before you stick anything. Lay the cables out, check their length and make sure the bundle can move when you adjust the desk or chair. Leave a little slack so nothing pulls taut.
How to Remove Sticky Residue From Desk Surfaces Safely
Sooner or later you will need to take a clip off. Doing it slowly protects the finish.
- Warm the adhesive gently with a hairdryer on a low setting
- Peel the clip back slowly, keeping it low and close to the surface
- Remove leftover residue with a little isopropyl alcohol on a cloth
- Wipe the area clean and let it dry
Avoid scraping with a blade or harsh solvents. They can scratch or dull the finish. If the residue is stubborn, test a small area first.
Booking Your Next Cable Tidy-Up With Just Tape Supplies
Once you have the right adhesive, cleaner and clips, the job is quick to repeat. Keep a small kit on hand so you can tidy up as your setup changes. If you are unsure which product suits your desk surface or cable weight, contact us.
Frequently Asked Questions
How do I stick cable clips to a desk without leaving residue?
Clean the spot with isopropyl alcohol first, then let it dry fully. Use a removable, residue-free adhesive such as the Nano Tape (£4.95 for a 3-metre roll), which is transparent, washable and suitable for smooth, clean, dry surfaces. Press the clip firmly and avoid sticking it over a fresh coat of polish or a dusty patch, as both can weaken the bond.
Are adhesive cable clips safe for wooden desk surfaces?
They can be, provided the wood is sealed, smooth and clean. Unsealed or oiled timber can absorb adhesive or let it bond unevenly, so test a hidden spot first. Foam pads such as the 3M FOAM Double Sided Adhesive Sticky Pads (£5.95) are one option to consider. Always remove a clip slowly and warm the adhesive first if it resists.
What is the best way to manage cables without drilling holes?
Combine a few well-placed adhesive clips with a cable tray or tidy channel fixed to the underside of the desk using removable adhesive. Route the cables so the weight sits on the clip rather than hanging from one point, and leave a little slack so the cables are not under tension. This keeps desks tidy without any permanent marks.
How do I remove adhesive cable clips without peeling the finish?
Warm the clip gently with a hairdryer to soften the adhesive, then lift one edge slowly. Avoid pulling straight up, which can tear lacquer. Finish by wiping the area with isopropyl alcohol to lift any remaining residue, then test the surface for damage before reusing it.
